Assembling WS1001 Weather Station
Setting up the weather station is a process of several steps in order to make this system work properly and measure weather conditions as accurately as possible.
Prerequisites for proper assembly
- Screwdriver (included)
- Metal wrench (included)
- Batteries, x2 AA not rechargeable (not included)
If you use rechargeable batteries, you may harm your device.
In order to properly deploy the weather station, you will need two (2) AA batteries. These are not included in the box.
Using old and new batteries together, especially low-quality ones or used, increases fire risk. For safety, use high-quality batteries of the same age and type.
Step by step instructions
Assembling the wind sensor

Be sure that you place the wind cup assembly on the shaft at the top part of the sensor. The wind vane should be placed on the shaft at the bottom of the sensor.

The wind sensor consists of a part that measures the wind speed (through wind speed cup assembly) and another that measures the wind direction (though wind vane). Both wind speed cup assembly and wind vane should be pushed onto the shafts on the part of the outdoor sensor, which is on the opposite side of the rain collector. Be sure that you place the wind cup assembly on the shaft at the top part of the sensor. The wind vane should be placed on the shaft at the bottom of the sensor. After pushing each of the parts, tighten the set screw with a Phillips screwdriver (size PH0).
Both parts should rotate freely. There should be no noticeable friction when the wind cup assembly rotates. However, the wind vane’s movement has a small amount of friction, which assists in providing steady wind direction measurements.
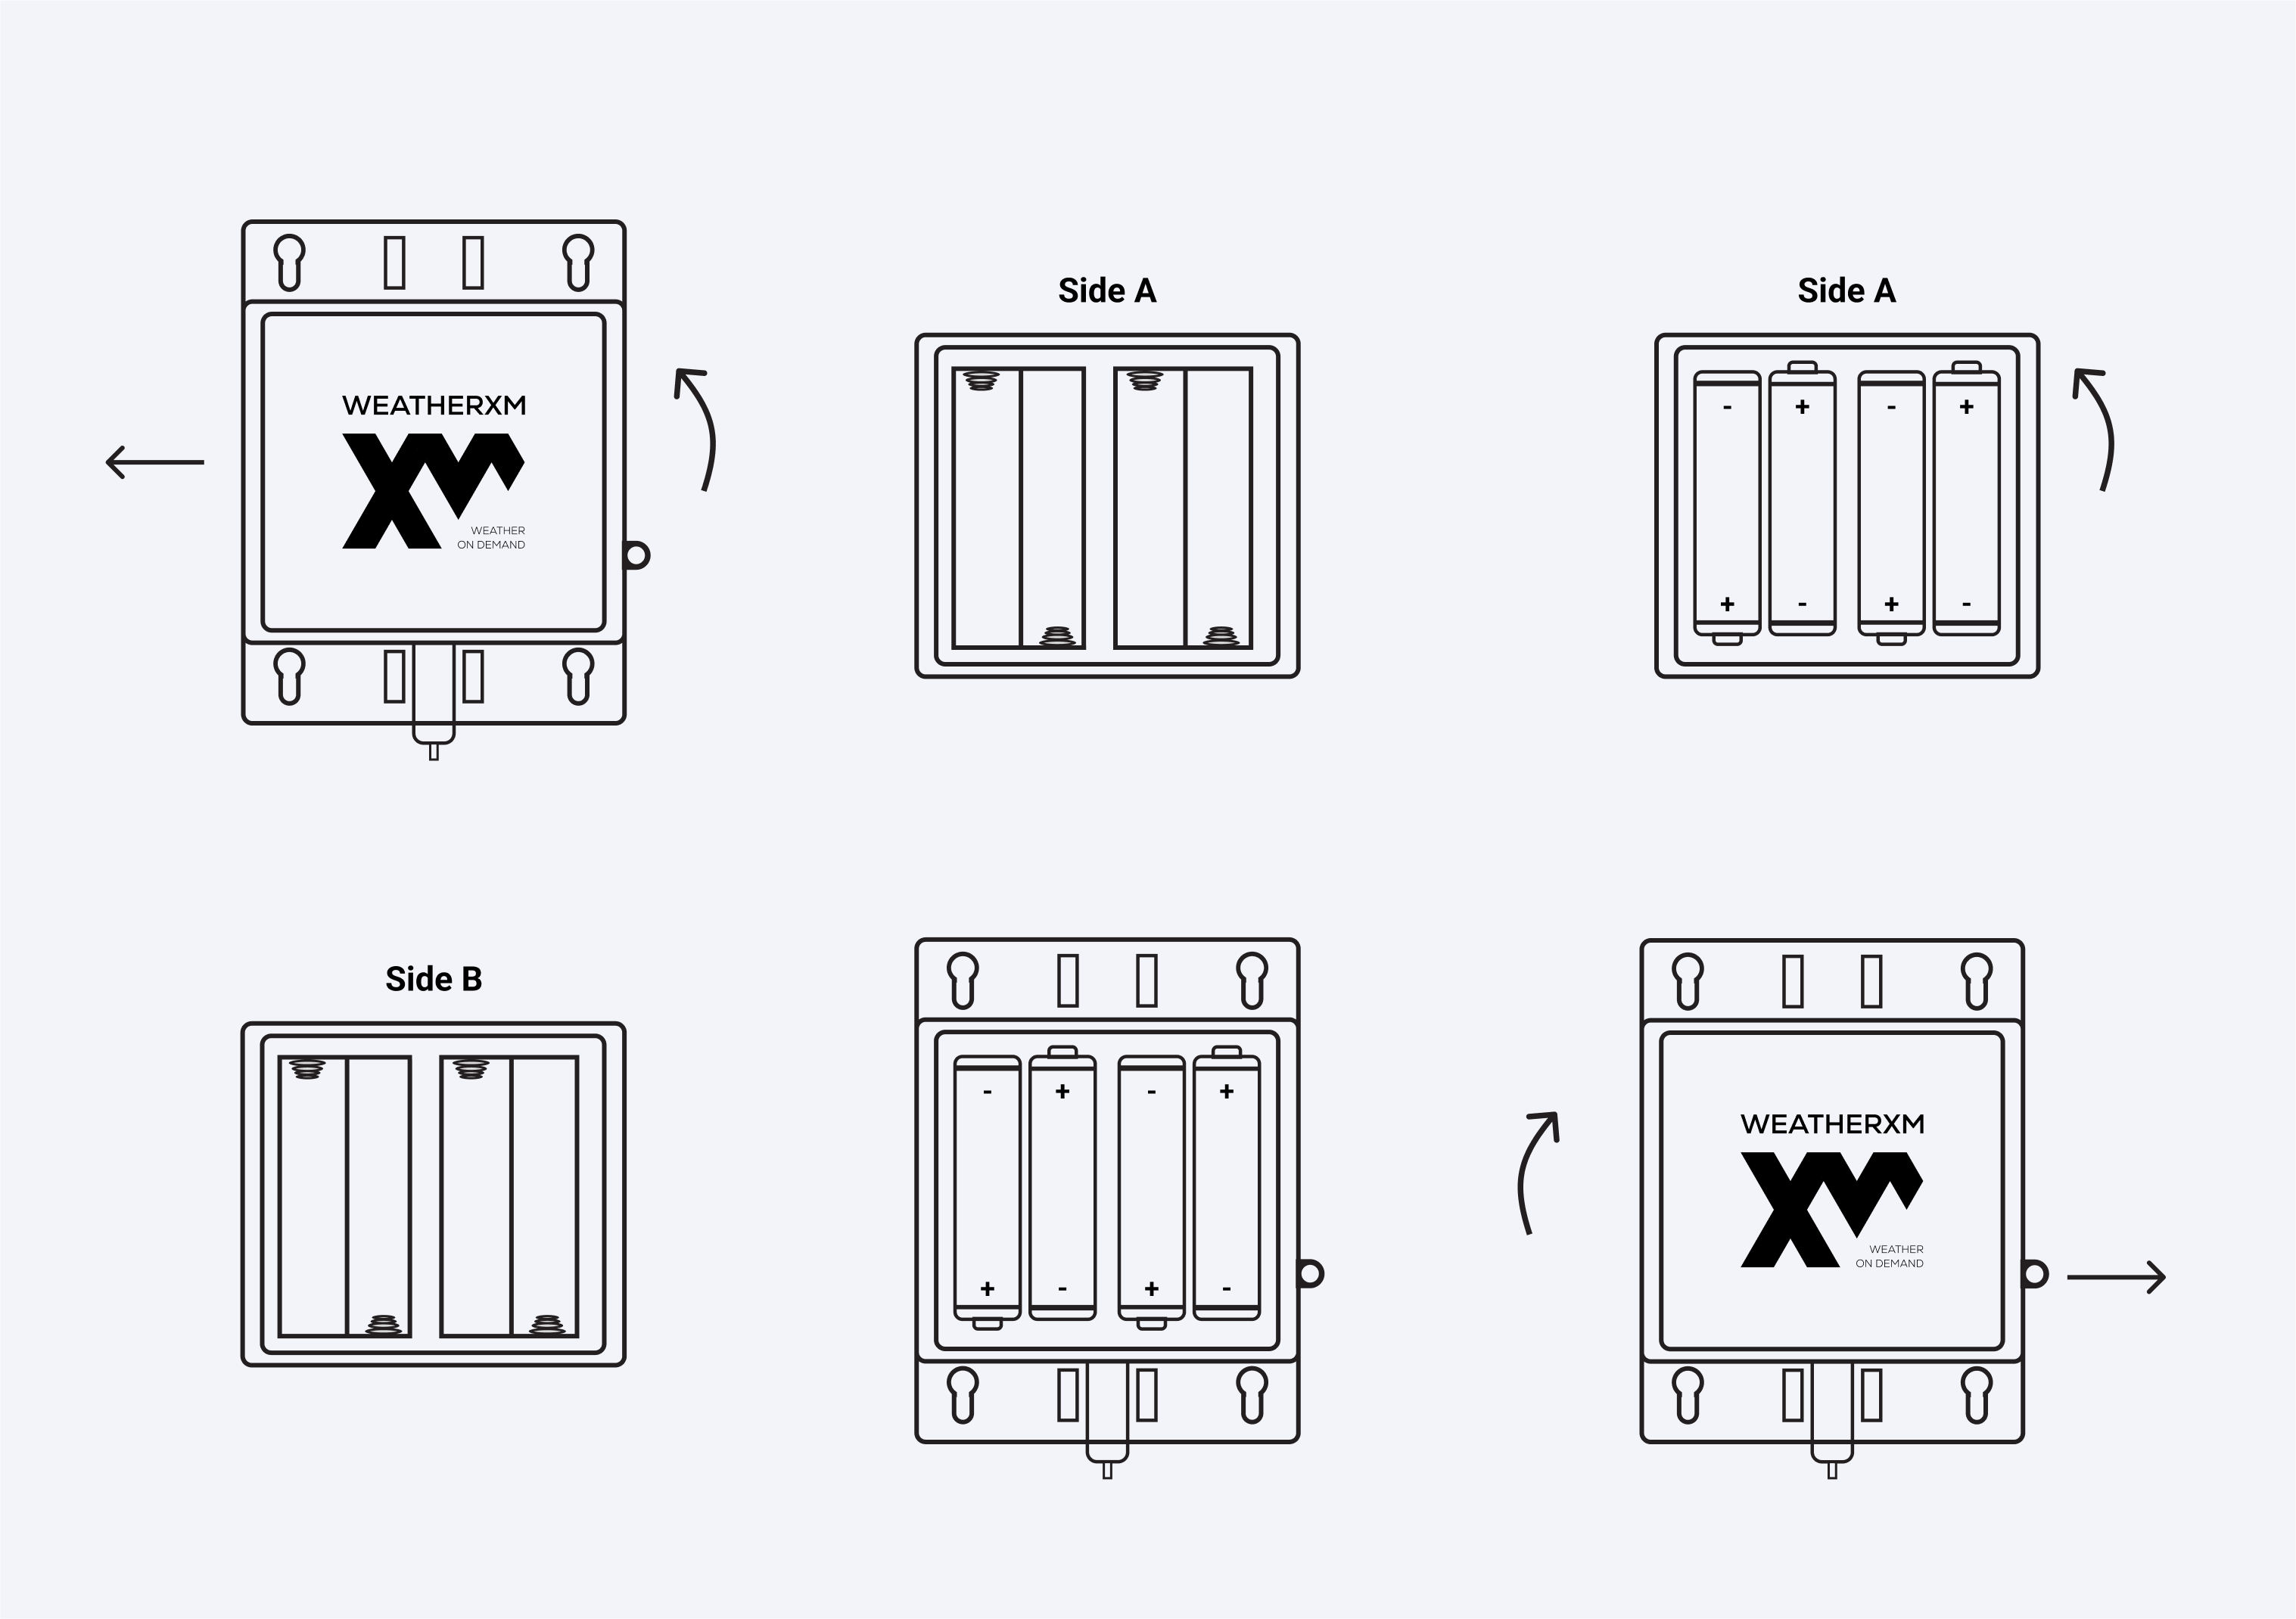
Installing batteries

Use a screwdriver to open the battery compartment and insert 2 AA batteries. Once the batteries are inserted, the LED indicator on the back of the sensor should turn on for 4 seconds and then flash every 20 seconds indicating that the sensor transmits the data. Note that the LED flashing only indicates the transmission of the data from the outdoor sensor and it does not assure the reception of the data by the WG1200 Gateway. Although alkaline batteries are sufficient for most climates, lithium non-rechargeable batteries could be used for cold weather climates. The primary power source for the outdoor sensor is the solar panel. When solar power is available, a super capacitor is charged and is later used during night and when there is insufficient solar light. In climates that frequently sustain temperatures below 0°C (or 32°F) the use of lithium batteries is recommended as these are performing better than alkaline batteries under such circumstances, but depend on battery manufacturer and quality.
Rechargeable batteries should not be used, as they provide lower voltages and lose power over time. Solar panel is not used for charging the batteries, but only provides power to an internal super capacitor, thus no point in using rechargeable ones.
Batteries should not be installed backwards. This may permanently damage the outdoor sensor.
Using old and new batteries together, especially low-quality ones or used, increases fire risk. For safety, use high-quality batteries of the same age and type.
External Battery pack installation
While not mandatory, we strongly recommend the installation of the battery pack for the following reasons:
- Extended Battery Life: Utilising only two batteries will result in the station depleting its power within 3 to 5 months, depending on environmental conditions. Installing the battery pack increases the battery life by approximately four times, significantly reducing the frequency of battery replacements.
- Improved Accessibility: The battery pack includes an extension cable (~3 meters), providing easier access for battery replacement when needed.
- Open the Battery Pack: Begin by pulling the clip on the side of the battery pack to open it.
- Access the Battery Base: Gently pull out the battery base. You will see eight battery sockets arranged in groups of two (two pairs in the front and two in the back).
- Insert the Batteries: Place a battery in each socket, ensuring correct polarity alignment.
- Reassemble the Battery Pack: Carefully place the battery holders back into their original positions, ensuring they are oriented correctly (i.e., the cable should remain at the bottom and should not be twisted).
- Secure the Battery Pack: Close the lid of the battery pack and push the clip until it clicks into place.
- Prepare the Weather Station: On the weather station, remove the battery cover.
- Insert Dummy Batteries: Insert the dummy batteries into the station as you would with regular batteries, ensuring correct polarity.
- Close the Weather Station Cover: Close the embedded lid on the weather station and fasten the screw securely.
- Mount the Battery Pack: The battery pack can be attached to a pole using the two provided zip ties.
If the dummy battery is not installed in the correct orientation, no power will be provided and the LED indicator will not be flashing.
In case that LED is permanently on or does not light up at all, make sure that the batteries are inserted fully and in the correct way.
Remove Sticker from Solar Panel

Remove the black sticker from the solar panel. If not, batteries will deplete and then the station will switch off.
In case that LED is permanently on or does not light up at all,make sure that the batteries are inserted fully and in the correct way.
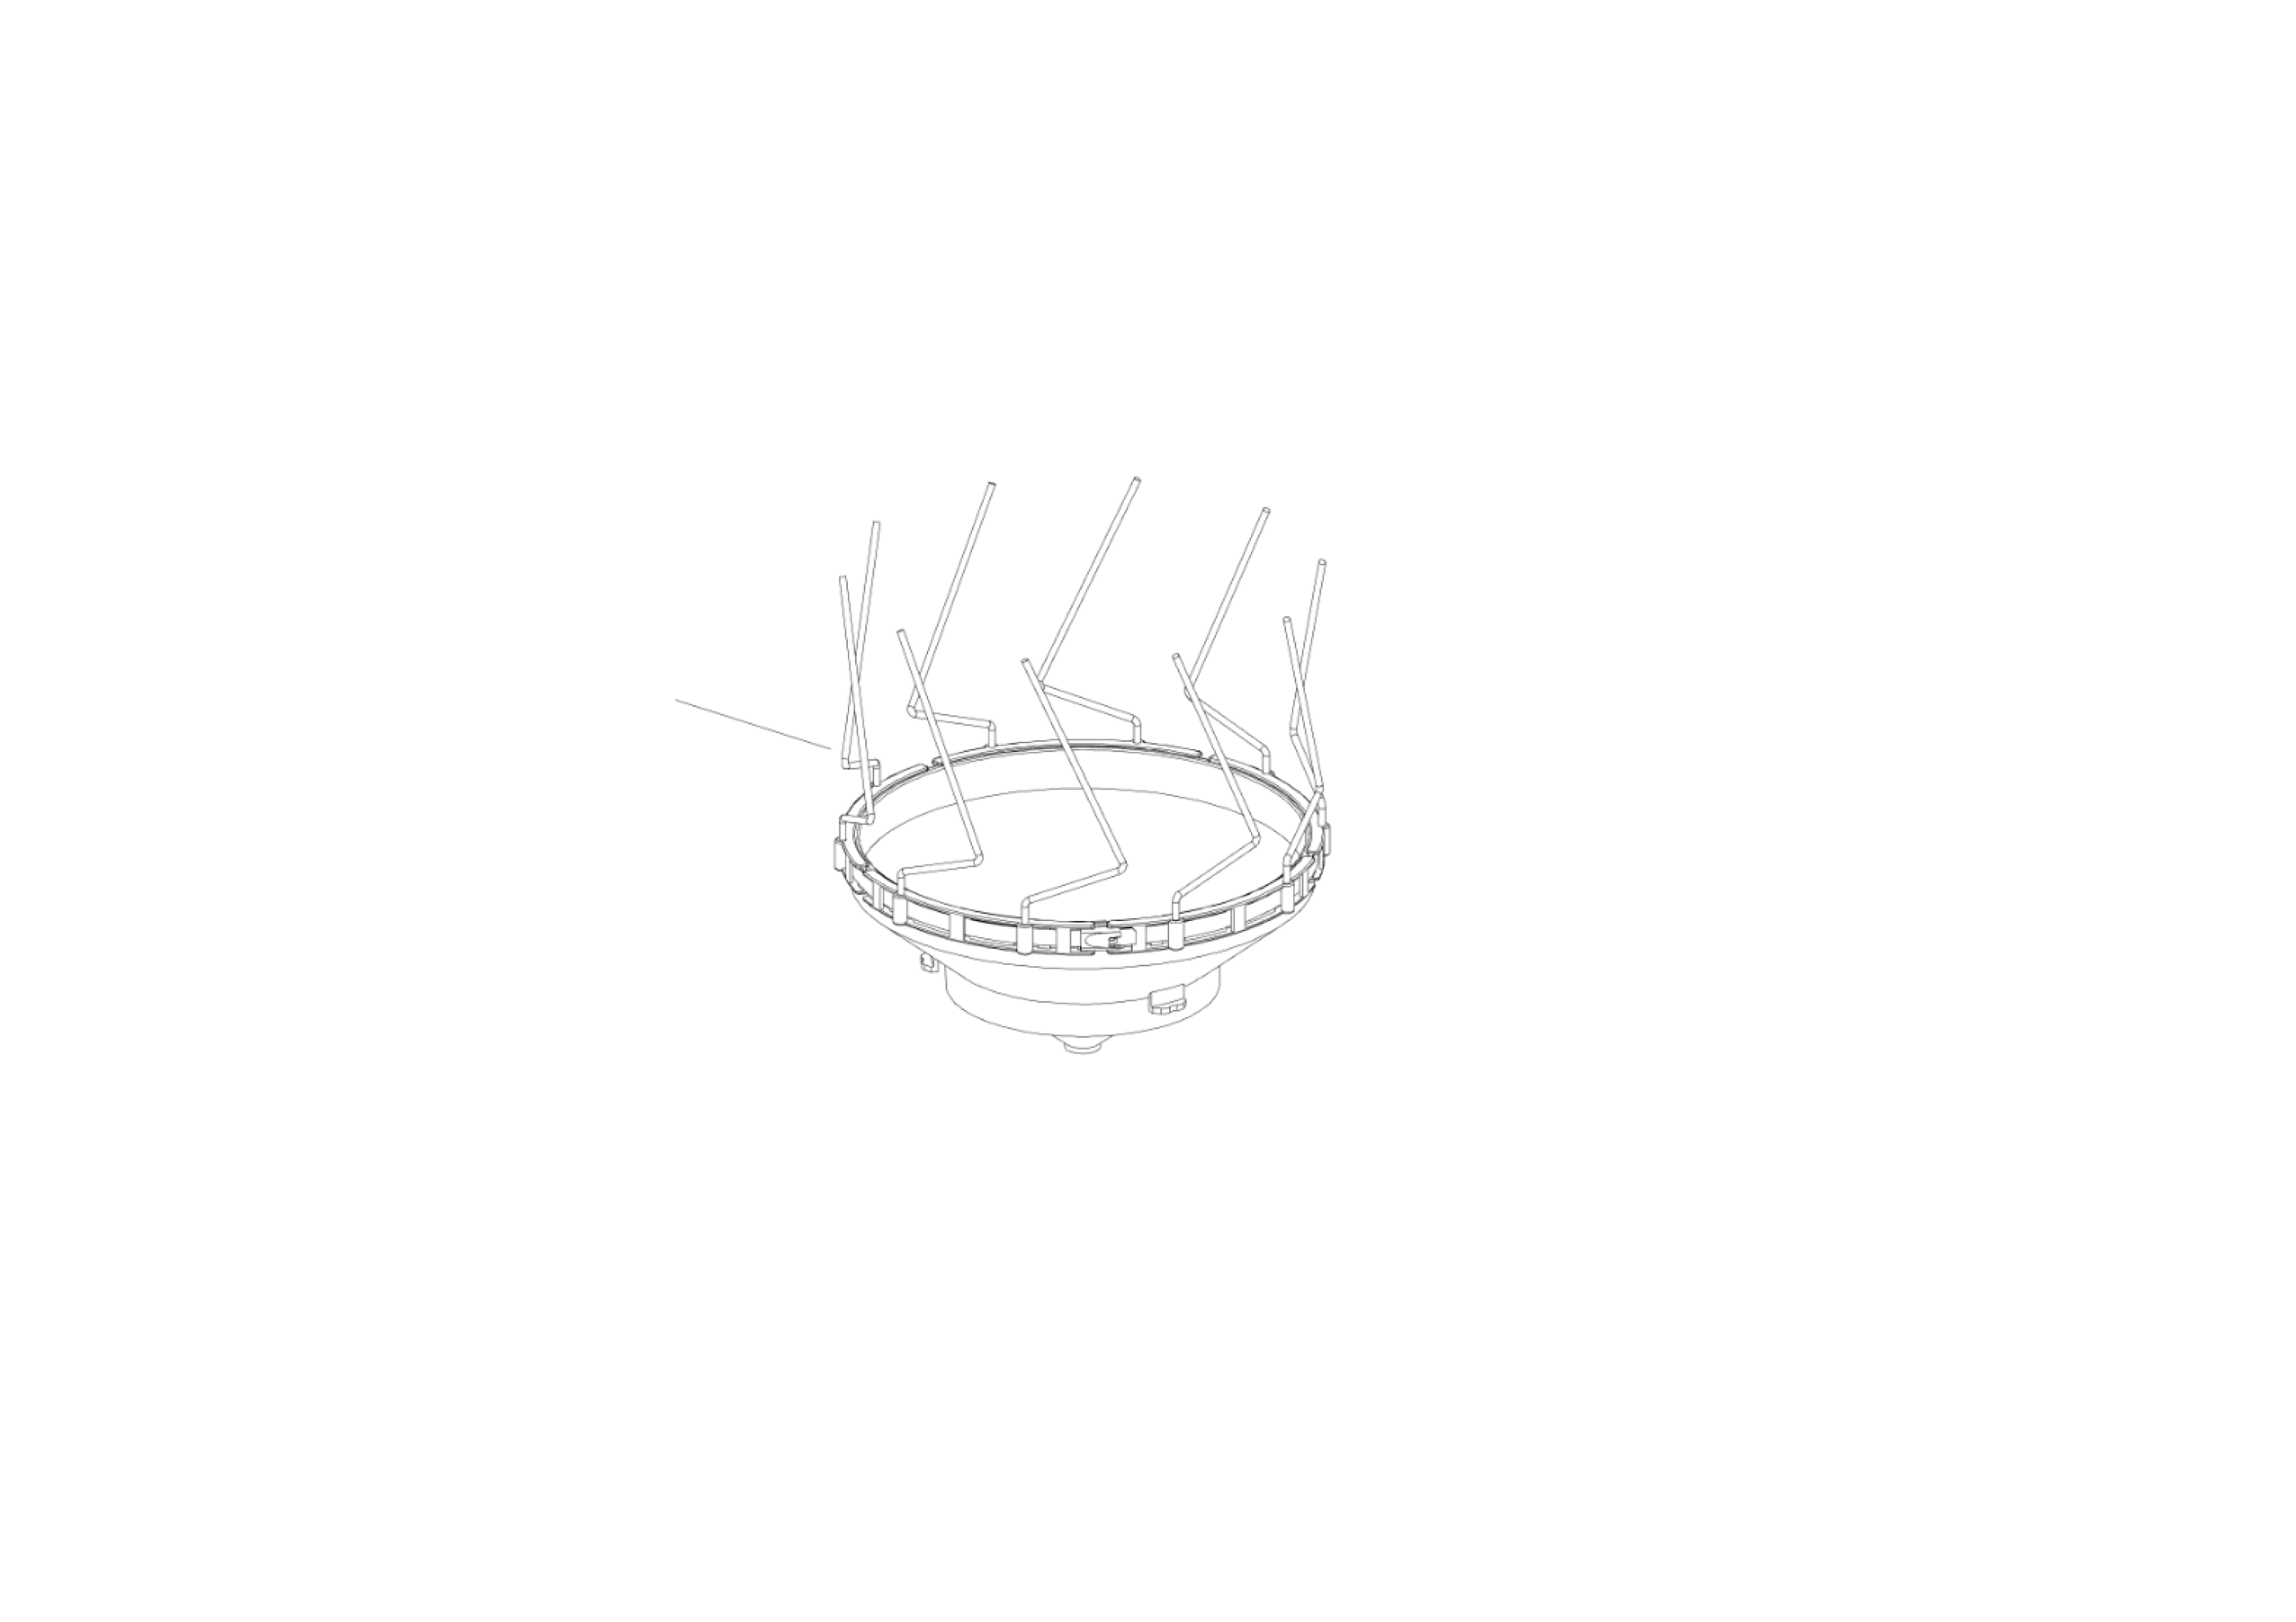
Installing Bird Spikes
The bird spikes are designed to be installed on the rim of the rain cup to deter birds from perching on or around the rain cup.
Included Components
Each weather station comes with the following bird spike components:
- Metal Spikes
- Rim-Mounted Spike Holders: These are designed to fit around the edge of the rain cup.
- Metal Zip Ties: Two metal zip ties are included. Only one is required for installation; the second is provided as a spare.
Installation Instructions
- Prepare the Spike Holders: Insert a metal zip tie through each spike holder, ensuring that the holes are facing upward.
- Insert the Spikes: Place a metal spike into each hole on the spike holder.
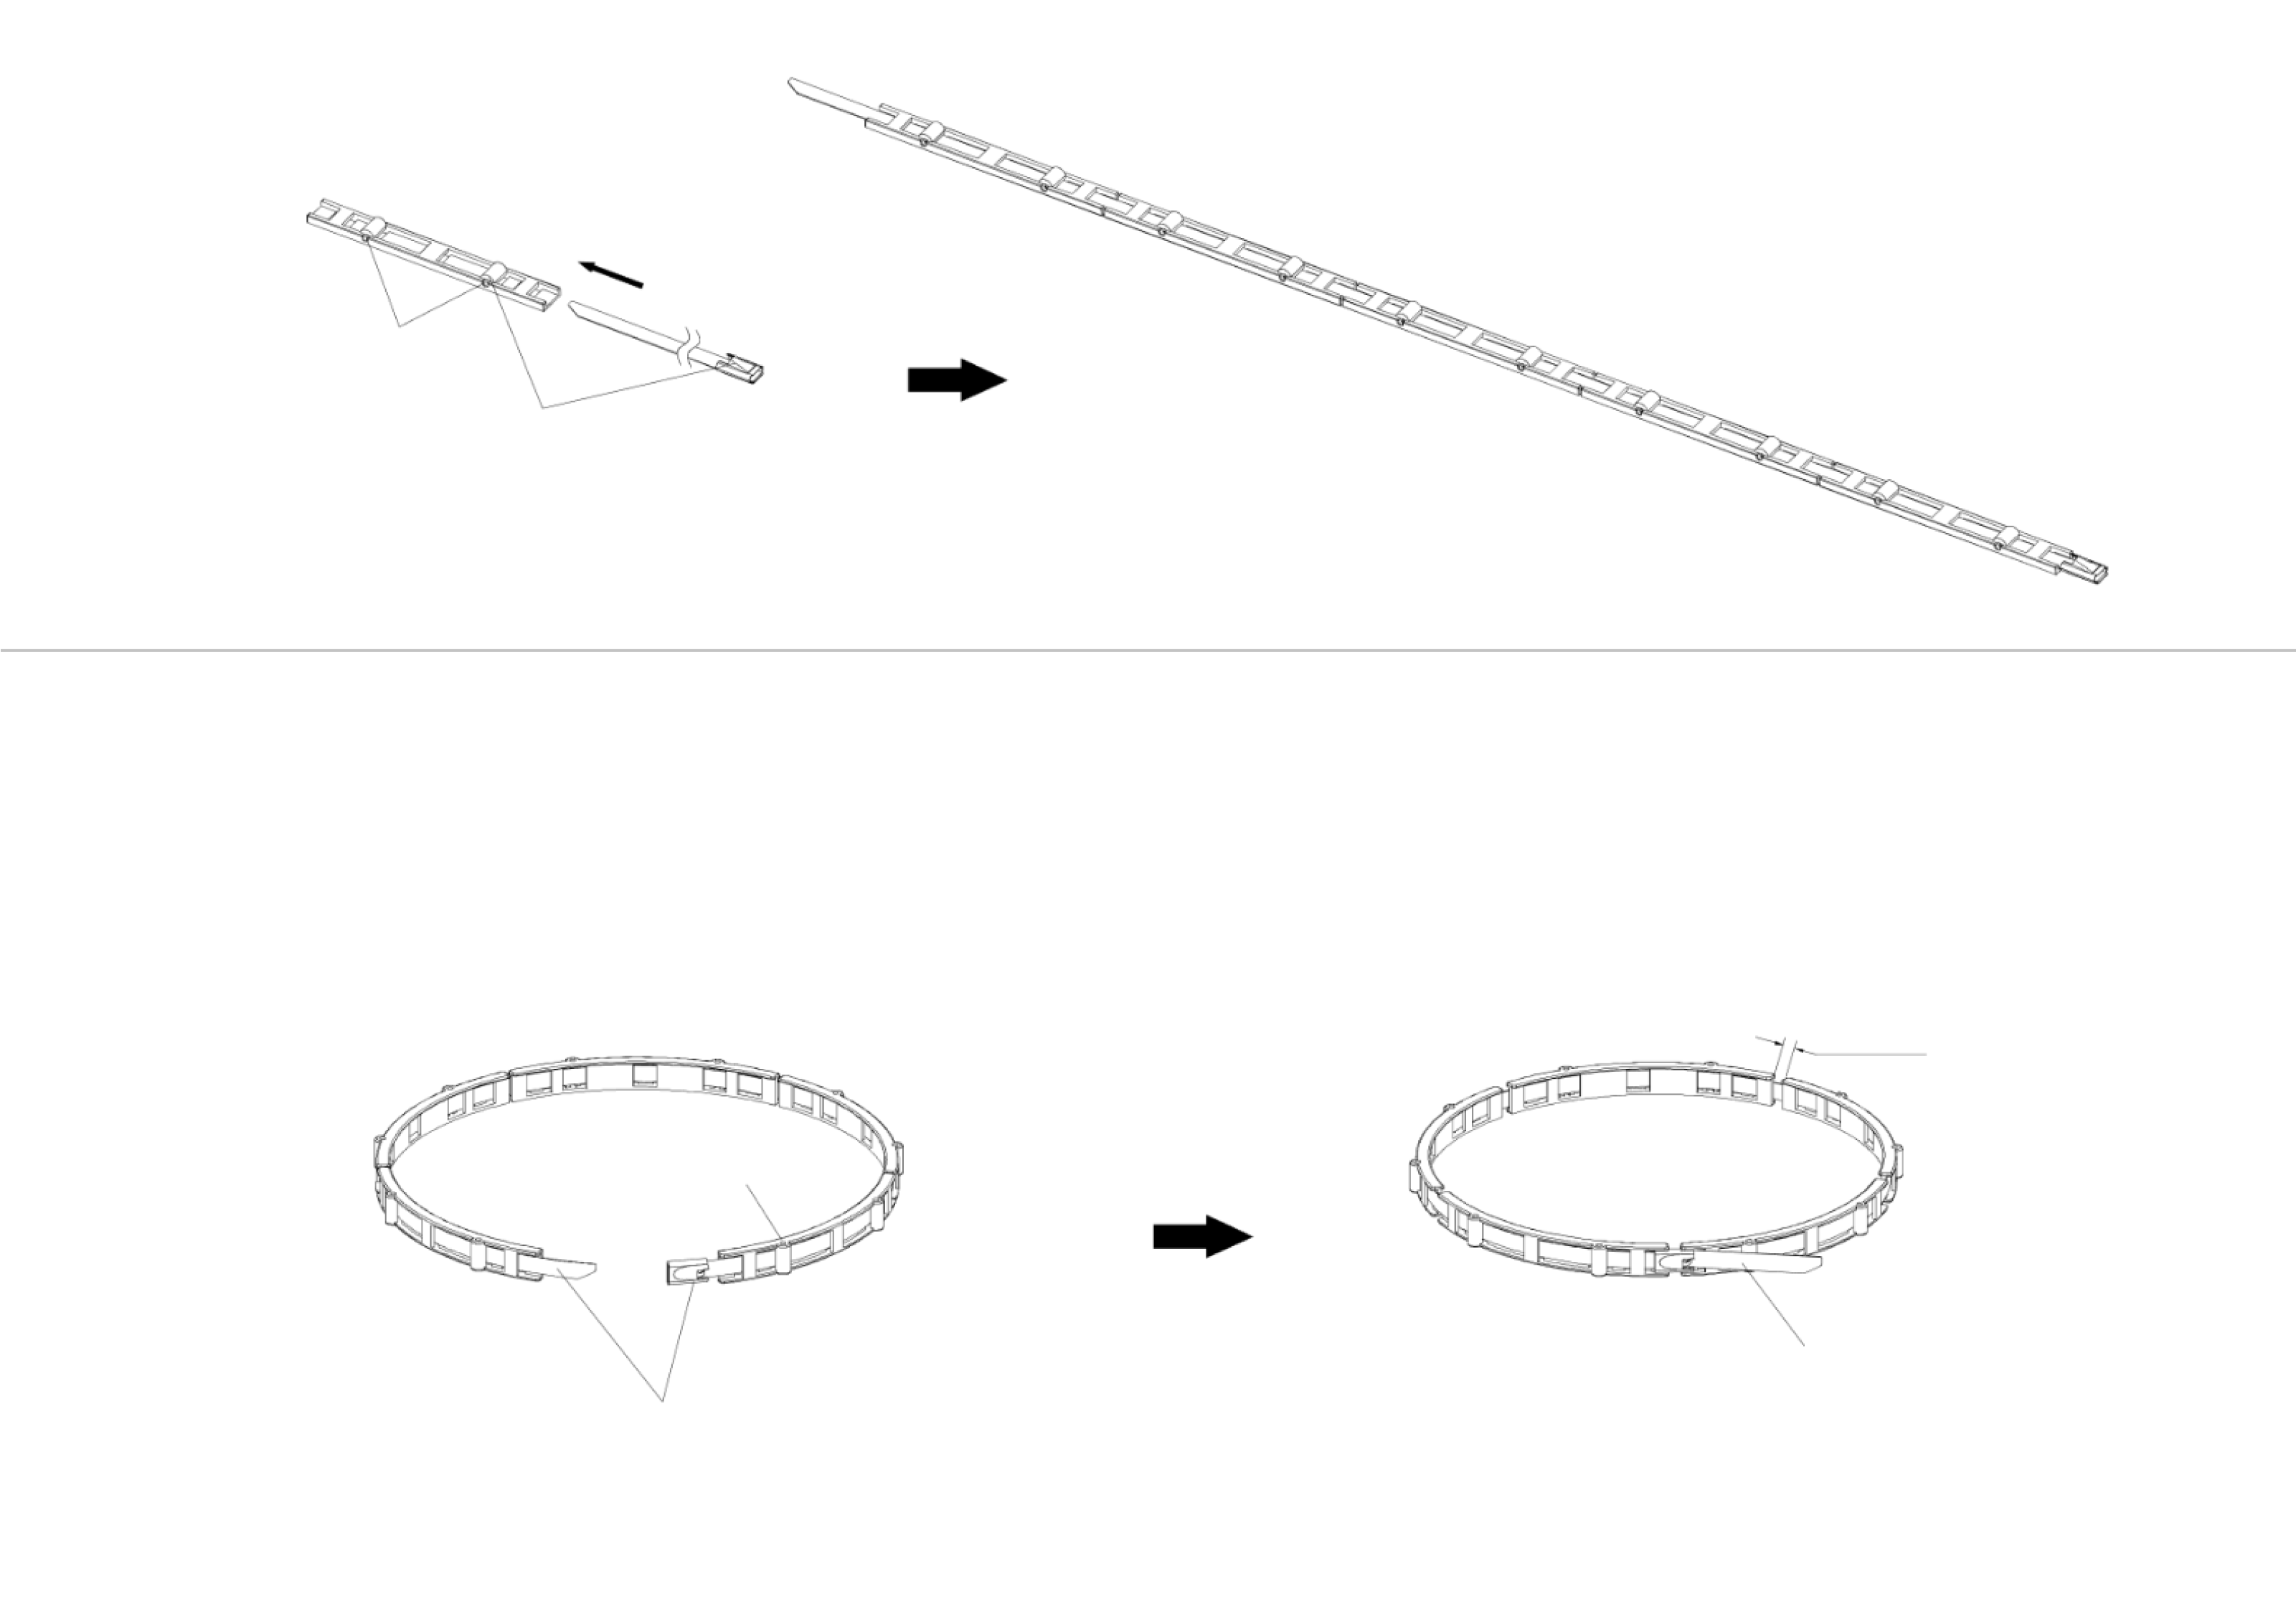
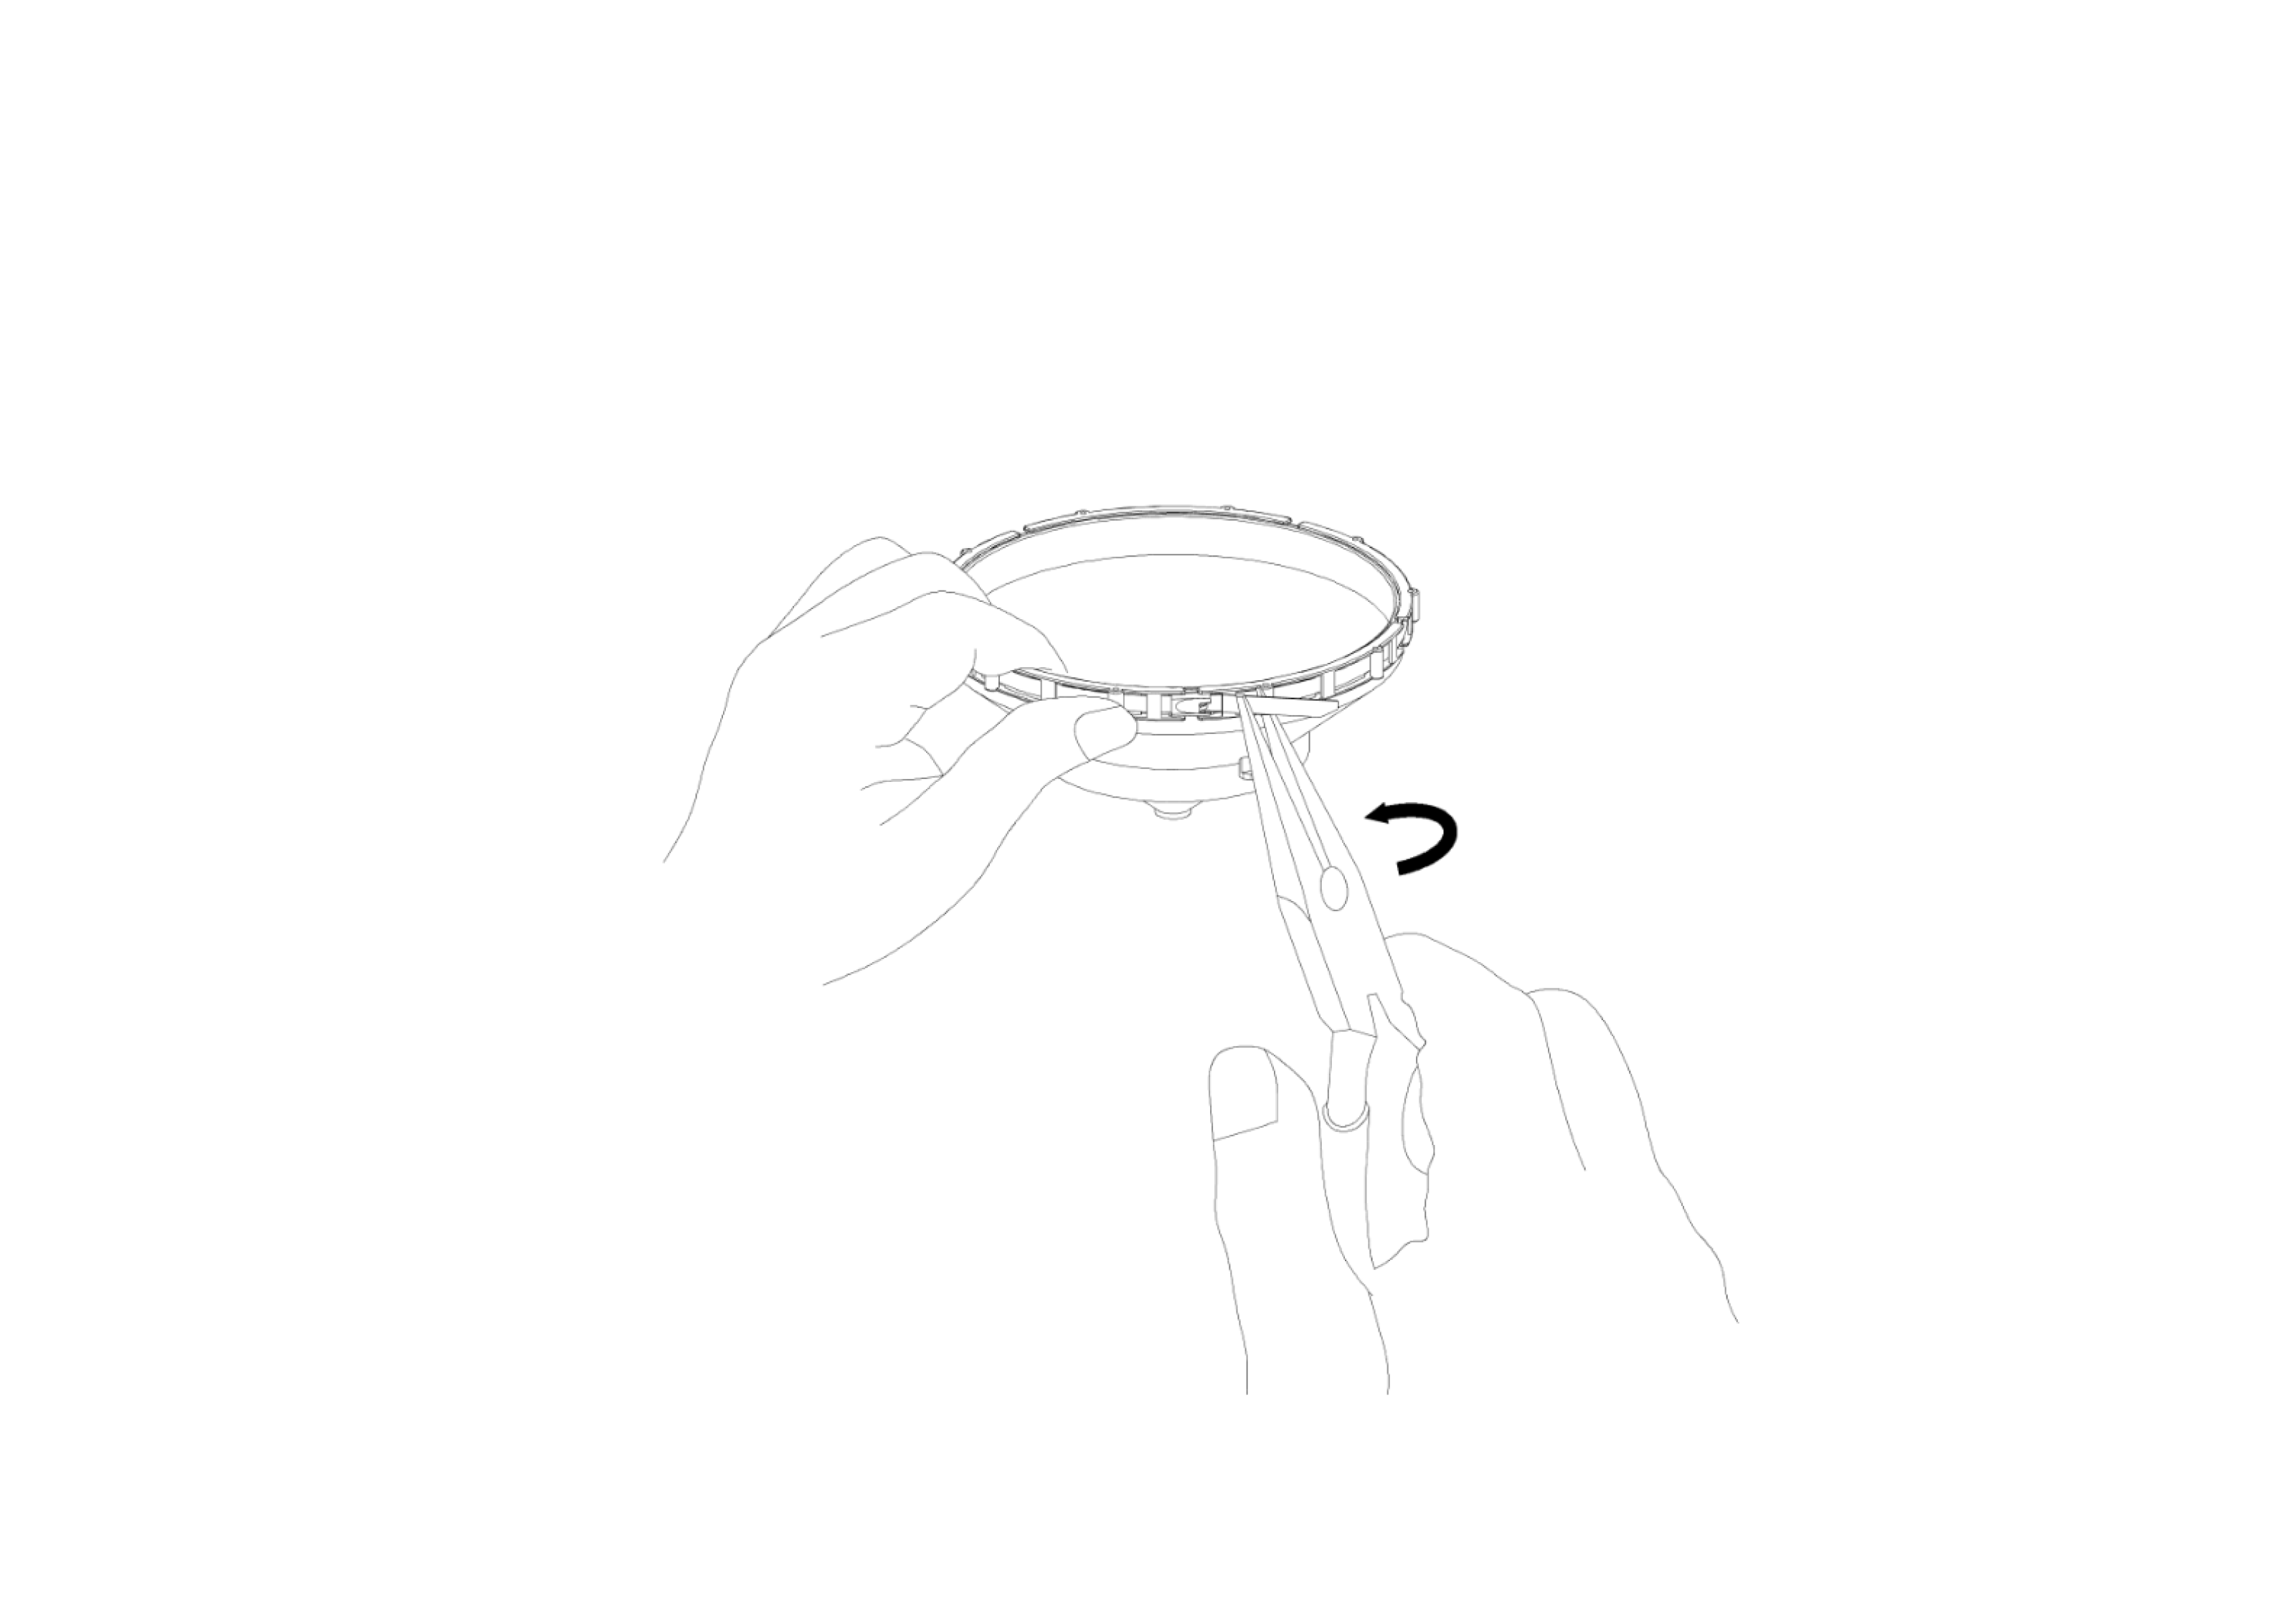
- Attach the Spike Holders to the Rain Cup: Wrap the zip tie around the rim of the rain cup and tighten it securely to prevent the spike holders from loosening or falling off. For easier installation, it is recommended to first remove the rain cup by twisting it lightly before attaching the spike holders.
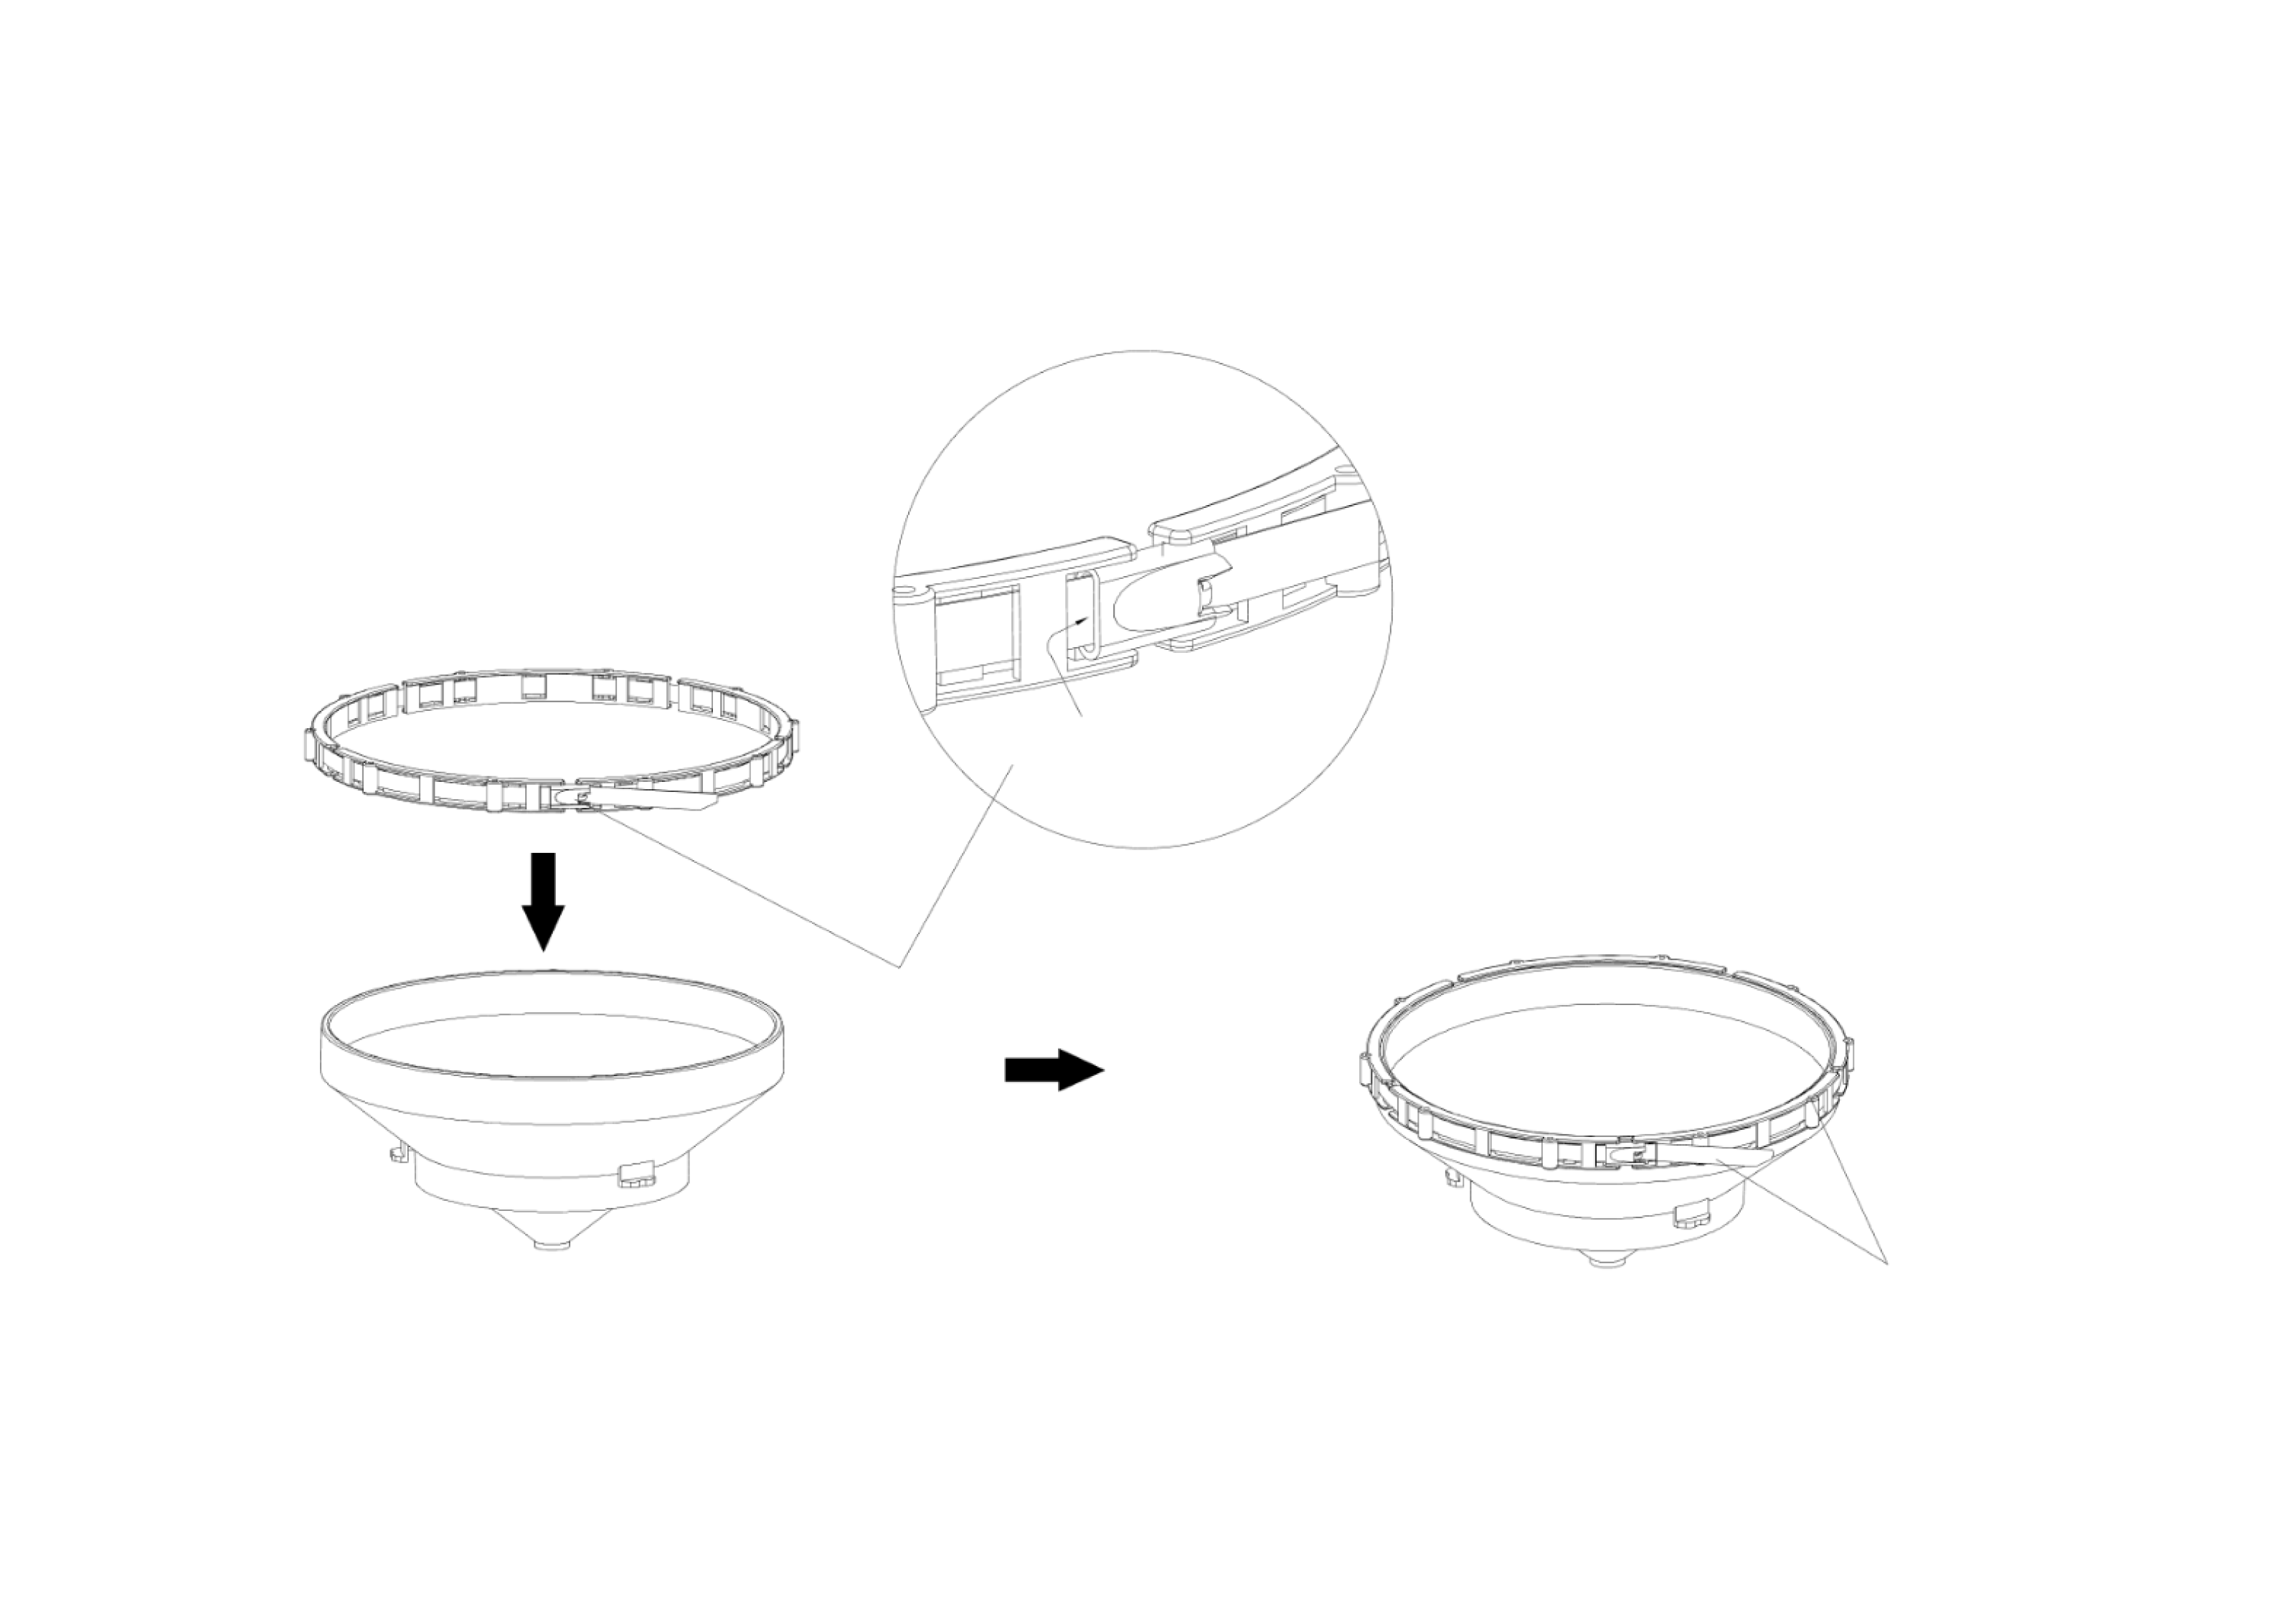
- Secure the Metal Zip Tie: Carefully secure the metal zip tie on top of the rain cup to ensure the spike holders are firmly in place and will not fall off.
- Place the spikes, short side down, in the designated spots on the ring. The final setup should match the image below.
Installing U-bolts and metal plate

U-bracket installation
The U-bolts and the metal plate are used to support the mounting of the outdoor sensor on a pole. The straight edge of the metal plate is inserted in the groove at the bottom of the unit (at the opposite side of the solar panel). The curved part of the 90-degree angle bent edge of the metal plate should be oriented to the wind sensor in order to “hug” the mounting pole. After inserting the metal plate, the U-bolts should be inserted through the respective holes of the metal plate. Loosely screw the nuts on the ends of the U-bolts. They will be tightened later when mounting on the pole (see Mounting the outdoor sensor).